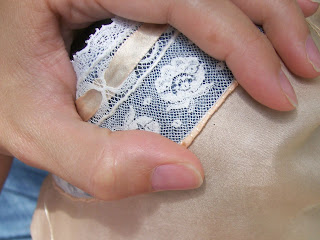
Trim the seam to 1/4 inch, no more, and press it back away from the neckline. Be very careful when trimming and don’t snip your lace!
Now for the HARD part! Finish the seam with a rolled hem. Sounds simple enough but I must say this is one of the most difficult stitches to do consistently and well. When finishing a straight edge it is not as hard but on a curve as the neckline it can be a little tricky. Practice is the only thing that helps.
My best tips are; 1) not to leave too much fabric when trimming the seam or the hem will be too bulky, 2) not to leave too little fabric when trimming the seam or it will be difficult to get the hem to roll, and 3) use plenty of good old fashioned spit to moisten your fingers while rolling the fabric over your needle!! It just doesn’t want to go otherwise! Don’t worry, you’re going to wash it later anyway!
The clearest instructions I could find on how to carry out a rolled hem is in "French Hand Sewing" by Sarah Howard Stone on page 17. I am including a (really bad) copy of her illustration here as it is for educational purposes. There is no better book written on the subject. It contains clear detailed written instructions as well as "Janet Arnold" quality illustrations on all aspects of French Hand Sewing.
Getting started is the hardest part. Roll the fabric over your needle. I’m telling you, a little spit helps a lot! remove your needle from the roll and insert it under the roll, coming out at the top of the hem at the neckline. Come up under the roll at the neckline again, causing the thread to wrap around the roll (whip), repeat the length of the hem. The tricky part is keeping the roll even and consistent. You may need to re-roll around your needle or a straight pin many times as you go. It also helps to secure the end of the fabric to the trusty brown paper or use a sewing bird if you have one. Sometimes I sit crossed leg on the floor and pin the end to the knee of my pants. Whatever works. I personally felt like my stitch became acceptable just as I was finishing the hem!!
Not to worry, this project will present many opportunities to practice!


I've been looking all over for someone like you! I wanted to try my hand at making my own vintage clothing, from the 1920's specifically, but couldn't find any patterns or information about how it was made.
ReplyDeleteKeep up this fantastic blog!
Yay! Then I'm not doing this simply for my OWN amusement!! :D You made my heart sparkle!! Thanks!
ReplyDelete