Alas... back to the sewing room!! It is my favorite place after all!
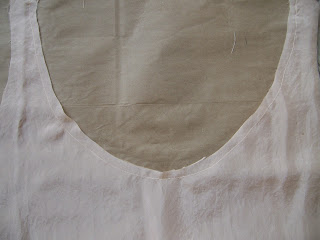
When working with delicate fabrics such as this very thin lingerie silk, it is necessary more so than ever not to rush or skip steps. To ensure that the neckline is stable and does not stretch while attaching the yoke you must run a machine "stay" stitch 1/4 inch or so away from the neck edge.
Next, to position the lace yoke, line up the shoulder seams and center front, placing the edge of the "beading" lace just below the edge of the fabric so that the "edging" lace will line up with the rolled edge back neckline later. Pin generously and hand baste the lace to the chemise using a contrasting thread with a simple "running" stitch.
At this point I realized I had forgotten to add the pin tucks to the front!
Oops! Nobody's perfect!
Fortunately pin tucks do not take up any significant fabric so it is not impossible to add them now, but I recommend ideally adding them before basting on the lace yoke.
Fold the front of the chemise in half lengthwise lining up all the edges, pin and press lightly towards the center. Measure down 4 inches from the bottom of the yoke and mark with a pin. Bring your threaded and knotted needle between the folded layers and out of the fabric on the fold, right where the pin mark is. Then, "wrapping" the fold once with the thread, insert the needle on the backside of the fold and come up very close to the edge on the top side of the fabric. Make a tiny "running" stitch along the fold very close to the edge all the way to the yoke as seen in the photos.
To finish the seam, insert the needle into the front of the tuck and bring it out on the back side of the chemise opening up the folded layers, secure your thread and trim. Lay the chemise flat with "right" side up, press lightly at both sides of the tuck to encourage it to stand up.
Note: An iron is a seamstress best friend! Use it often! It is the key that separates a "home made" looking garment from a "professional" made one.
For the second and subsequent pin tucks; measure, fold and press to the right or left 1/4 inch from the previous stitching line. Begin stitching each tuck 1/4 shorter than it’s neighbor so the overall group of tucks has a pointed effect when complete.
If you look closely at this photo you can see the needle between the folded layers of fabric.
Now with coordinating thread, hand stitch the bottom edge of the lace yoke to the chemise using as small and even "running" stitch as you can manage.
The red thread in this photo is the basting stitch. The true seam in coordinating thread can be seen on the backside of the fabric just below this basted line.


Your blog looks fantastic so far. After working with the crazy cost cutting demands of industry it is wonderful to be reminded that here is another way. It's beautiful and thoughtful work like this that made me start sewing in the first place. It would be great if you could add the follow by e-mail gadget so I could get automatic notices of when you post.
ReplyDeleteThanks for complements and the e-mail tip! Just added the gadget!
ReplyDelete